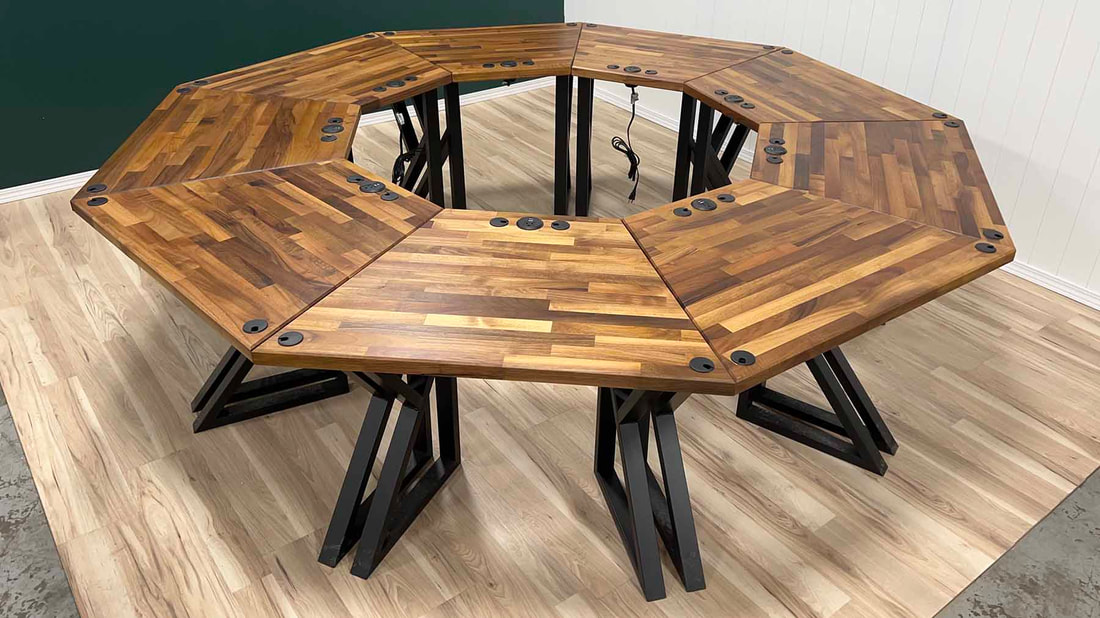
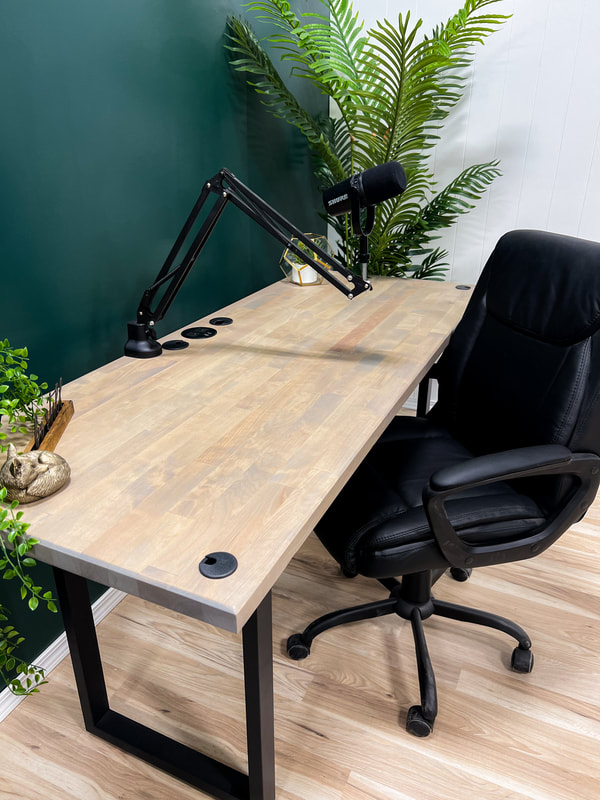
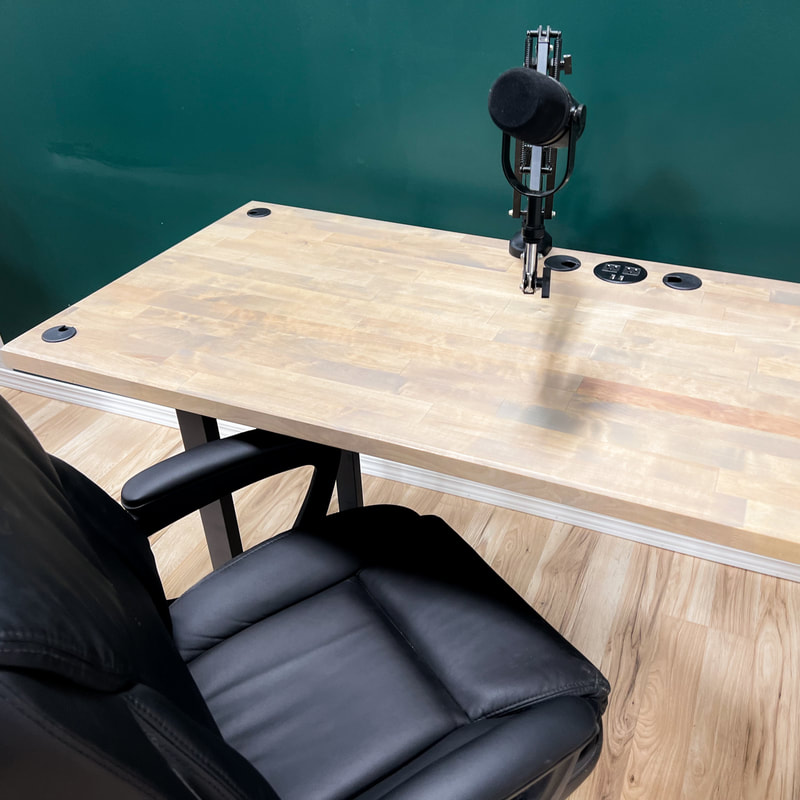
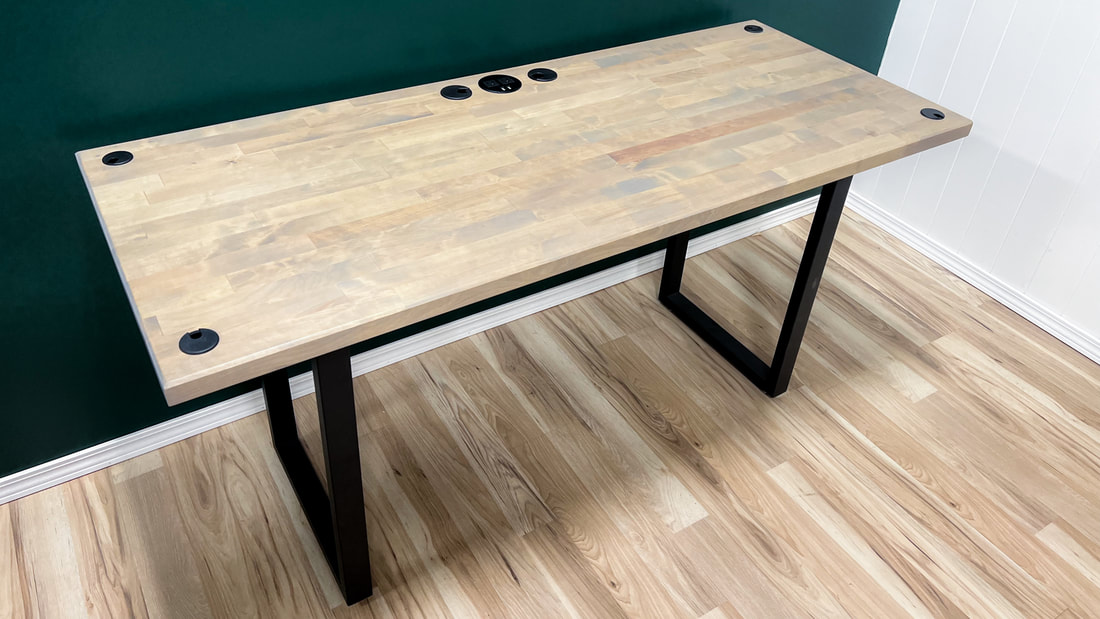
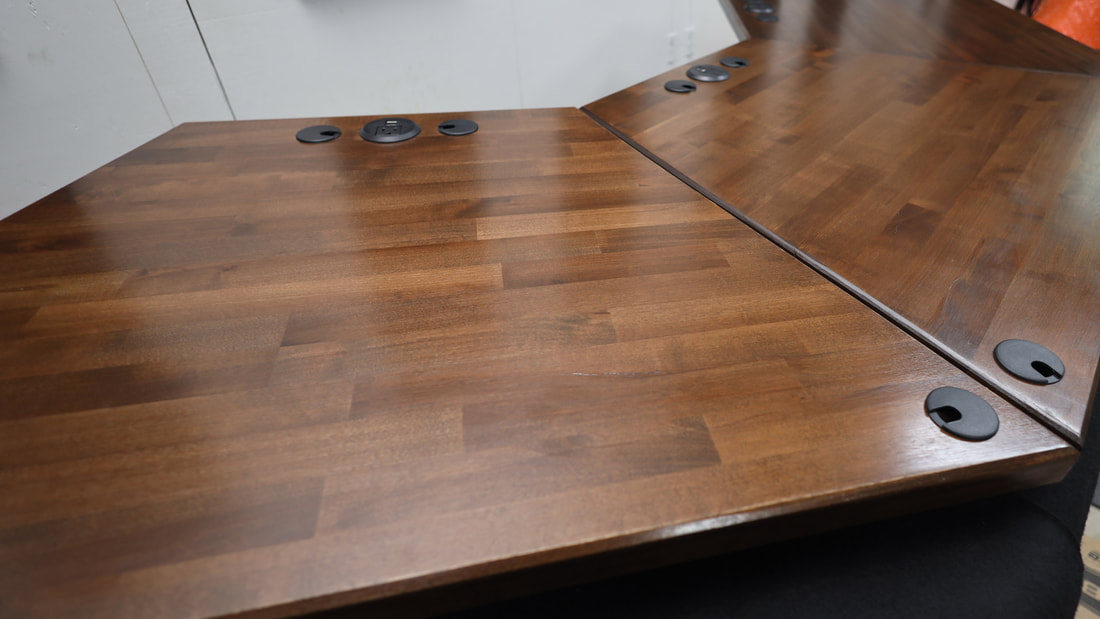
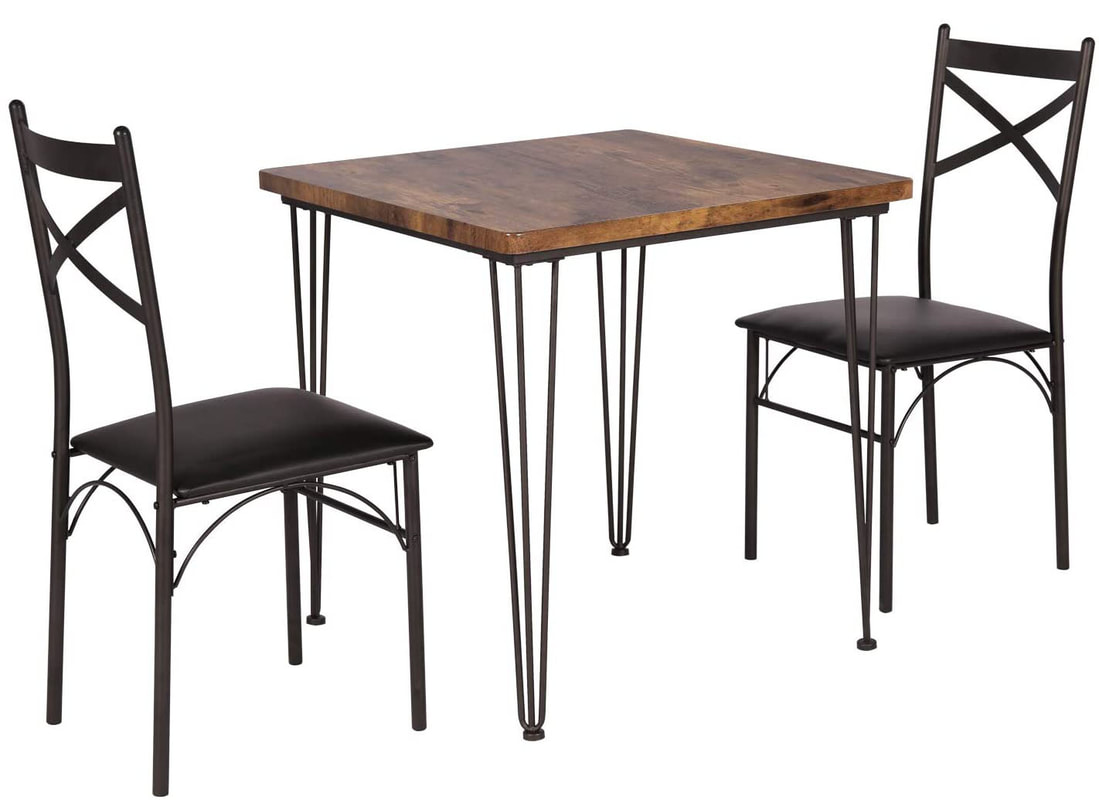
 It's been quite the journey! From building the Podcast Gear For Beginners website as a resource during lockdowns in April 2020, to creating a uniquely designed modular-style podcast table and making our first sale. Thank you all so much for the support. Our newest venture is Podcast Tables Shop, where you can find custom-built podcast tables for sale. There is inventory currently in stock, or you can custom order a new table to go into production right away. These podcast tables are great for audio and video recording, or using as a podcast production desk or office desk. With these tables, you're sure to get versatility, beauty, and functionality. OUR WORKTABLE FEATURES
We're building and shipping these tables all over the United States to content creators, businesses and organizations who are taking content marketing seriously and investing into their strategy. Get your podcast table from PodcastTables.Shop today! Simply fill out our contact form to get started. We look forward to working together! - Jason, Own, Podcast Tables Shop
0 Comments
We're excited to review the Maono AU-PM500 condenser microphone! Maono has yet to release this microphone, get the skinny from Podcast Gear For Beginners. Check out the YouTube video for the full review, and the unboxing! Highlights of the PM500:
I'm excited to bring you the Maono AU-HD300T podcaster microphone review! Huge thanks to Maono for sending this our way. Check out our review video! The quick of it:
Maono really hits the beginner podcaster with a great product for a great price point at $69 at Maono.com. 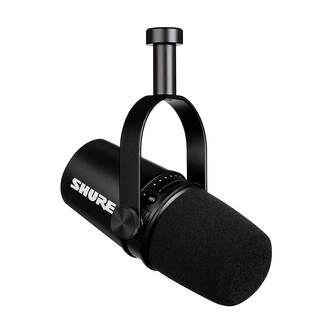
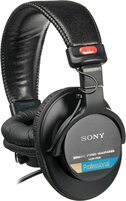
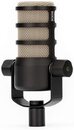
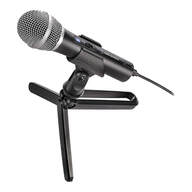
This is it folks, the SHURE MV7 XLR/USB Microphone : Only $249 on AmazonPowered by RedCircle
I've found my favorite podcasting microphone, you guys! I began podcasting back in 2012, took a hiatus, and started again in 2016. Over the course of my career, I've used a slue of microphones:
So what makes it the best? 1) USB & XLR options Most microphones are either USB or XLR, but the Shure MV7 is BOTH. This is important because it makes it versatile for application. I use the MV7 at my desk on a boom arm connected to my Macbook Pro via USB, but then I run it down to my studio and plug it in via XLR into my Zoom L12 mixer. If you're just starting your podcast and are looking for a mic, the MV7 is a great option because it offers you a way to plug & play right out of the box if you're recording to your laptop. This will save you money not having to buy a mixer and a microphone, but just the microphone. The USB option means the MV7 contains a pre-amp inside the microphone housing and doesn't require additional equipment to run it into the computer. If you decide later on that you want to use a digital recorder like the Zoom H4n or Zoom H6, then your MV7 is still compatible via XLR. So you're not having to buy another microphone. This happens when people change their show format, or decide to add additional guests or hosts. You'll save money in the long run. 2) Audio quality Shure microphones are already known for high quality vocal recording, with the SM58 being a workhorse vocal mic for live situations, and the SM7b as the "holy grail" of broadcast mics. (Some would argue it's the RE20). But, Shure really stepped up their game creating a mic geared toward podcasters. A little late in the game, but better late than never. I bought the Rode Podmic because it was made for podcasters, but then the MV7 came out and I won't miss it. The vocals are nice and full, very full on the low end, and the mic does a great job of isolating vocals and rejecting side and rear noise. I'd call the MV7 broadcast quality, for sure. 3) Built-in audio monitoring and levels control What's super cool is the built-in monitoring feature, with a touch slider to control monitoring volume. It's a 3.5mm stereo (aux) jack that allows you to route your audio via USB from your computer into your headphones. The slider is right on the mic, so you can adjust it right in front of your face. 4) Form factor and build You wouldn't think that the way a microphone looks would matter, but it does, especially to podcasters. And, if you livestream your recordings, then it definitely matters. The Shure MV7 looks LEGIT. There's a silver option, but I got the sleek black mic option, and I feel like a total bad ass on camera using this microphone. It's built very well, with a metal yoke for mounting and sturdy knobs to tighten the tilt of the microphone. The connections are solid for XLR and 3.5mm, my only small qualm is that the usb port is by nature not as solid, but I'm willing to overlook this in lieu of the amazing overall quality of this podcaster microphone dream. THE Best gifts for podcasters this holiday seasonLooking for gift ideas for your podcaster friend, boyfriend, girlfriend, spouse, brother, sister, or somebody else I haven't mentioned that is trying to start a show or is already obsessed with casting pods and you've heard enough already? This list is for YOU. 2020 has been a helluva year. Who wouldn't want some legit gifts to round out the year on a good note? There are so many podcast equipment options out there, but here's what I'd ask for as a gift if someone wanted to really hit me with something nice, even for a beginner podcaster! These are in no particular order, it's just good gear that gets the job done, and is coveted by many podcasters and on wish lists all over the place.
BONUS IDEAS!
 This article is originally published on Descript.com. Remote interviews are a fact of life for every podcaster, and in today’s era of social distancing, more so than ever. Since you rarely get the chance at an interview do-over, nailing down your remote recording workflow is essential. We’ll show you how to prepare for and record a remote interview, so you get it right the first time — with some additional tips along the way to make sure all your bases are covered.
Choose the right remote recording setup for your podcast The first step is to determine the remote recording setup that best suits the format and content of your podcast and your production and editing workflow. In most cases, your best solution will involve recording remote interviews on Zoom, Skype, Google Hangouts, or a similar online conferencing service. This low-friction setup makes it easy for guests or co-hosts to contribute, but you’ll need to make sure you have the right software to record these interviews. It’s also wise to make sure you can record phone calls. Phone interviews don’t offer great audio fidelity, but they make a great backup option in case of technical problems or schedule changes. Phone interviews probably won’t be your first choice, but it’s a good idea to be able to record a phone call just in case you need to. If you’re recording with the same remote co-host on each episode of your podcast, consider a double-ender setup, in which you and your co-host record your own audio tracks locally and combine them in post-production. For most podcasters, this isn’t the most convenient solution, but it does translate into the highest audio fidelity for you and your co-host. The best way to record an interview is to prepare for it When it comes to interviewing - especially remote interviewing - a little preparation goes a long way. Do some research into your guest’s background, expertise, and projects. Who are they? Why is their work notable? What do you (and in turn, your audience) hope to learn from them? Putting together a rough outline of the questions you’d like to ask will come in very handy. Write down a handful of specific questions and key points, but keep your outline broad and high-level. That’ll allow you to more easily adapt to the flow of conversation. Maintaining that conversational flow remotely can be substantially trickier than doing so person-to-person. Prime yourself to listen more than you speak — in particular, try not to interrupt your guest. Editing out awkward silences between speakers is much easier than dealing with too much crosstalk! When it’s time to record the interview, take a couple final preparatory steps to ensure a clean recording. Close all unnecessary software and set your computer to “Do Not Disturb” mode to make sure unwanted distractions don’t pop up (or worse: end up in the recording). How to record a Skype call, Zoom interview, or Google Hangout For most remote recording situations, Zoom, Skype, or Google Hangouts are your platforms of choice. All three are easy to set up, simple for guests to use, and feature audio fidelity good enough for most podcasts. Both Zoom and Skype offer built-in call recording functionality, but Google Hangouts currently limits this offering to enterprise users. There’s an additional caveat: the file format (.MP4 or .M4A) that each platform outputs may not be what you want, depending on your podcast production and editing workflow. For maximum control over your final product, you’re better off using third-party apps to record computer system audio directly into the recording software of your choice rather than relying on their recording functionality. If you’re on a Mac, BlackHole is a great open-source tool that allows you to route audio between apps, which means you can record the audio output from Zoom (or Skype, or Google Hangouts) directly into your preferred recording software. On Windows, Virtual Audio Cable offers similar functionality. If you’re already using Descript to record, you won’t need to use additional audio routing software. When recording audio into Descript, open the Record panel, choose Add a Track, select your input, and choose “Computer audio.” Click the Record button whenever you’re ready, and audio from Zoom, Skype, or Google Hangouts will be piped into Descript. No matter which remote recording setup you use, make sure you test it — and test it again — with a friend or colleague before you’re actually recording your podcast. Troubleshooting when you should be interviewing ranks near the top of everyone’s Least Favorite Things To Deal With, so make sure everything is in order before your guest is on the line. How to record a phone interview with Google Voice Social distancing means nearly everyone has gotten used to handling calls and meetings on Zoom, Skype, or Google Hangouts. But maybe your podcast guest is really old-school, or their computer is on the fritz, or maybe they’re simply only able to access a phone during your scheduled call time. It’s likely phone interviews will never be your first choice, but being able to record an old-fashioned phone call will come in handy.Recording phone calls can be tricky, but using Google Voice to make an outgoing phone call from your computer means you can use the same remote recording setup detailed above to record the call. Follow Google’s instructions to set up Google Voice and then learn how to make an outgoing call. Once everything’s set up, you’ll be able to record phone calls with Google Voice just like you’d record an interview on Zoom or Skype. Again, make sure to test with a friend and then test again before your interview. If lossless audio quality is a must, record a “double-ender”For most remote recording situations, Zoom, Skype, or Google Hangouts are your platforms of choice. All three are easy to set up, simple for guests to use, and feature audio fidelity good enough for most podcasts. But if you have a remote co-host that regularly appears on your podcast, and you want to maximize the quality of your audio, a “double-ender” is the way to go: Each host or guest records themselves locally, and audio tracks are combined in post-production. For an additional cost, you can use third-party recording platforms that simulate double-enders without each speaker managing their own recording software. A traditional double-ender sees each speaker recording their own audio track using their recording software of choice (Descript, Audacity, Quicktime, etc.), and then the host or editor combines each speaker’s recording into a finished product. Each speaker should have a decent microphone — if they’re using a laptop microphone to record, you probably won’t hear a substantial advantage with a double-ender over a Zoom, Skype, or Google Hangouts recording. Alternatively, you can simulate a double-ender by using a platform like SquadCast, Zencastr, or Cleanfeed. These services record lossless audio from each speaker, upload each track to the cloud, and combine them automatically. These platforms cost money, but they’re a great alternative to a double-ender when guests or co-hosts don’t have the time or wherewithal to fiddle with recording themselves locally. Again, make sure each speaker has a decent microphone — otherwise you won’t reap the full benefits of lossless audio. Make remote recording hassles a thing of the past Recording your podcast remotely isn’t painless, but once you get the hang of it — and nail down your workflow — it’ll become second nature. Three dynamic microphones, 3 xlr cables, |


| |
BASIC FEATURES OF ALL PODcAST HOSTS
Most paid plans offer these basic features:
- RSS feed to submit to top podcast players
- Podcast stats and analytics
- HTML code for embedding your podcast to your website or blog
These features aren't going to vary much between podcast hosts. You can assume you're getting these main three no matter who you choose.
In addition to the basic features, you can expect a few others that may help your show, depending on how you use them:
- Customizable embed players - you'll be able to change the embed player colors, sizes, and other things to match the player to your podcast brand when you embed it into your website or blog.
- Better analytics - with paid plans, you'll get more data points when tracking who is listening to your show. For some, this is really important to analyze stats and use marketing strategy to reach a bigger audience.
- Episode transcription - many podcasters will use the transcription option to create robust show notes and turn podcasts into blog posts for SEO purposes. Unless you're using this strategy to try and rank your podcast website, it may not benefit you as much.
To answer the big question, here's my answer:
Use Buzzsprout Podcast hosting.
| |
Here are the reasons to use Buzzsprout as your podcast host:
Pay by how many hours of audio you upload per month.
I've used Buzzsprout for my company's podcast and it's a solid, user-friendly interface with paid plans to match your show's upload schedule. By that I mean that you pay for the tier based on how many hours of audio you upload per month. Other hosts will charge you the same rate no matter how much audio you upload. This is a GREAT feature that Buzzsprout offers.
Buzzsprout gets your show listed on every major podcast platform.
Reach tons of potential listeners by getting your podcast on Apple Podcasts, Spotify, Google Podcasts, and many others. Buzzsprout RSS feeds work with all the top directories, meaning your podcast will appear wherever people are searching for you.
Easily Monetize
If you get to the point where you have an audience big enough to monetize your show, they have an integrated monetization option. Simply follow their instructions and you're on your way, they make it very easy! They'll help match your show with sponsors, and there's also a way to link sites like Patreon, Podfan, Paypal and others onto your Buzzsprout public webpage.
Get a $20 Amazon Gift Card
Buzzsprout will send you a $20 Amazon gift card (sent after 2nd paid invoice) when you sign up using this link: SIGN UP FOR BUZZSPROUT
It really is a competitive market when it comes to podcast hosting, so why not sign up and get a free giftcard? Happy podcasting!
 Photo by Leonard Reese on Unsplash
 Churches have been sharing sermon audio for a long, long time. Do you remember tape ministries? I do. I grew up in a small Baptist church and after each service, the sermon tapes were available for purchase for a couple of bucks. Someone sat in the back, recorded the audio and then produced the tapes, and eventually CDs. Okay, trip down memory lane over. We're now in 2020. Podcasts have taken off over the last decade, and have exploded within the last 2 years. Millions of people listen to podcasts each month. Many churches have already jumped on the podcast game, but there's always the latecomers. I'm here for you.
Where you COULD pay for a podcast service in order to host your shows, you don't really have to. Here's why: there are 100% FREE podcast hosts out there. The primary reason you need a host is to have have place to store your audio that generates an RSS feed that gets submitted to podcast players, like Apple Podcasts, Spotify, etc.
The most important things you gain by using a paid service are analytics and customization for your audio embeds, in my opinion. Podcast hosting companies will offer more features, if you decide to pay.
So here's the list of FREE podcast hosts (that I know of):
I've used both of these hosting companies and haven't run into any issues whatsoever. You get unlimited uploads and space. If you're simply posting weekly sermon audio, then they'll be a great fit for you.
The process is simple.
- Sign up for the free hosting service
- Upload your audio file
- Fill out the template for information (title, description, etc.)
- Publish your episode
- Follow Anchor & Redcircle's instructions on distributing your podcast to the major podcast players and apps.
- (Bonus*) Use the embed code to put those episodes onto your church website.
OUR Audio Editing & PUBLISHING SErvices
Maybe you haven't even started the process and need to start from scratch on this entire podcast thing, we can help there too.
Click the CONTACT US button to find out more information and for rates.
I believe the best equipment is the kind that gets the job done. It's what you're using or will use that helps you create a consistent and high-quality podcast.
With that being said, here's what I have used, and highly recommend.
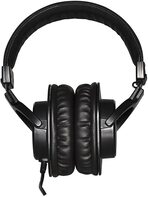
Top Three Podcast Microphones
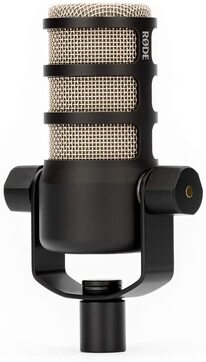
- Rode Procaster (XLR, Dynamic Mic)
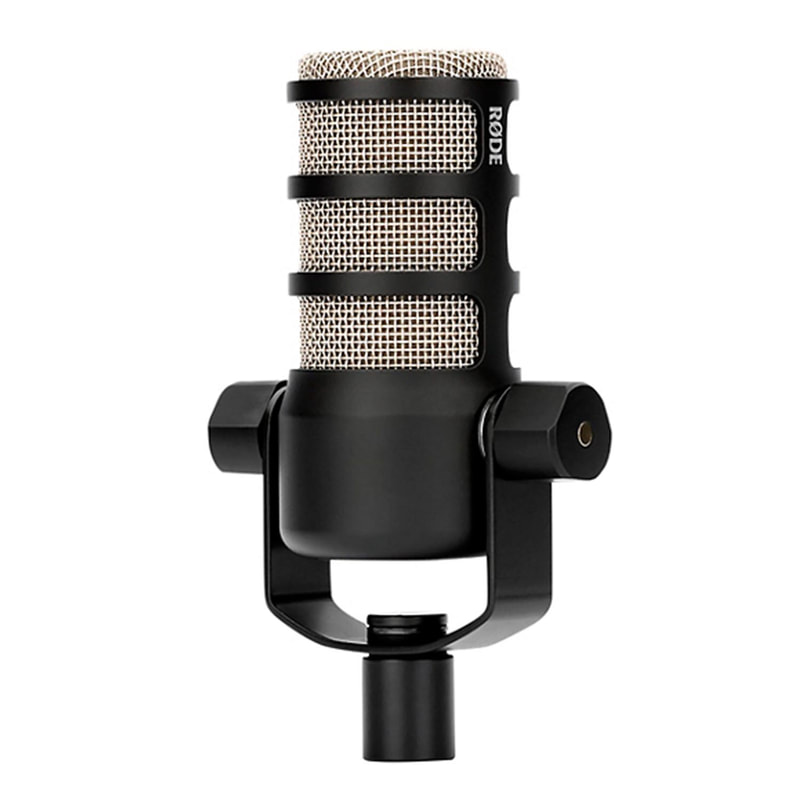
- Rode Podmic (XLR, Dynamic Mic)
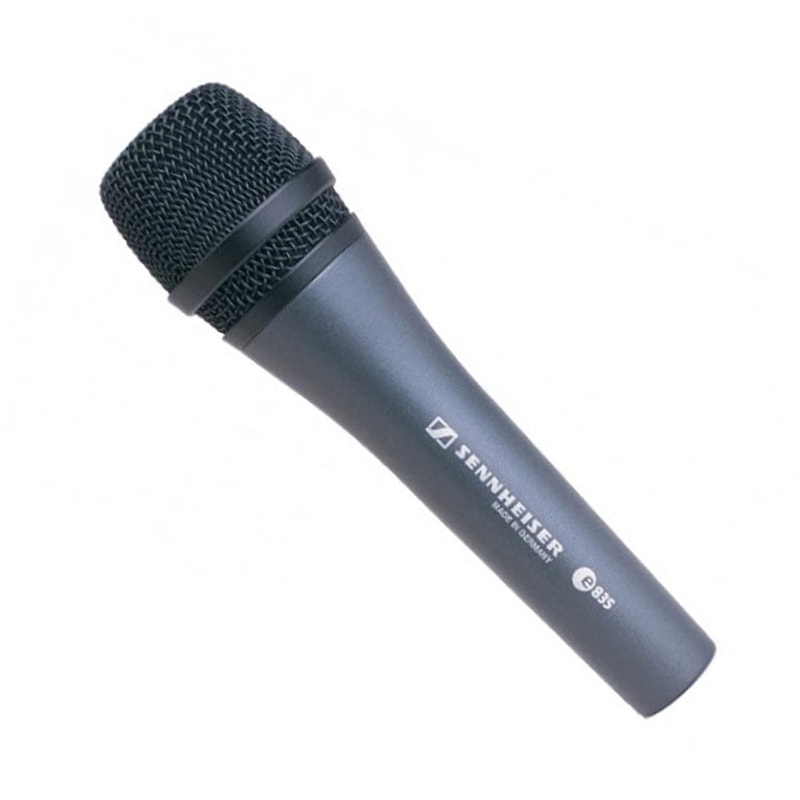
- Sennheiser e835 or Shure SM58 (XRL, Dynamic Mic)
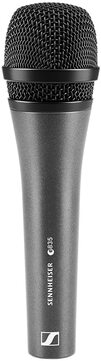 |  | 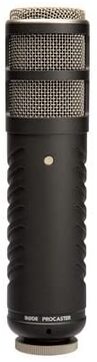 |
Sure we have to work on getting vocals to sound similar in post production, but it's not enough to cause us not to podcast with that setup. We used to use four Sennheiser e835 microphones at the table, but we eventually upgraded.
Top Three Mixers/Interfaces FOR PODCASTING
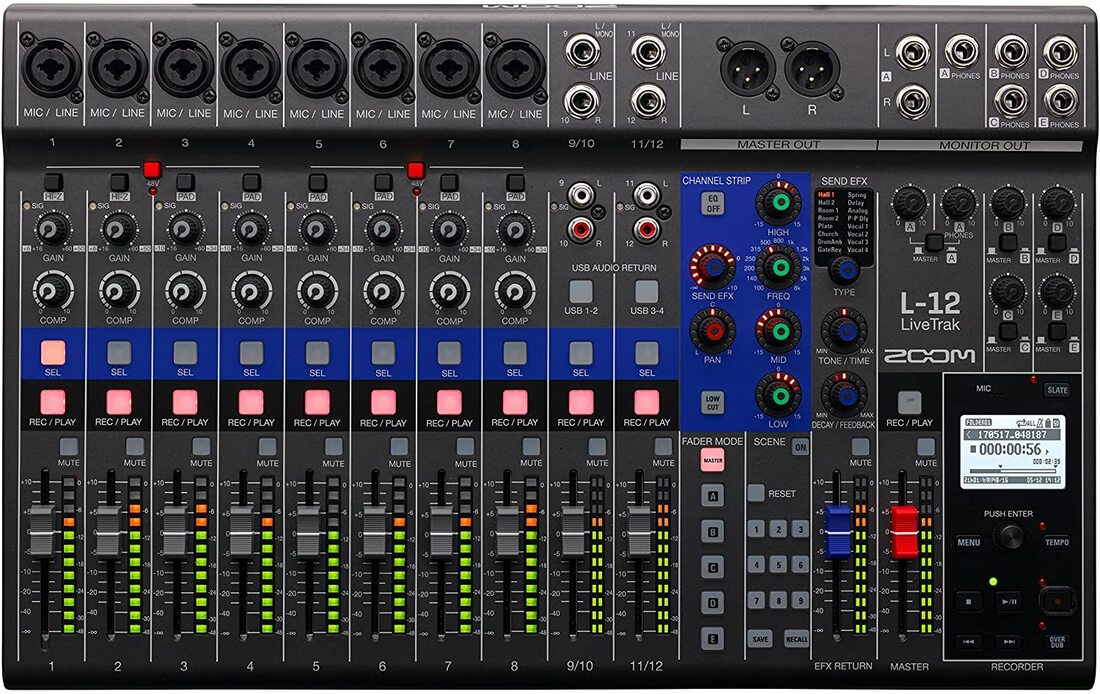
- Zoom L12 USB Mixer
- Zoom H6 Digital Recorder
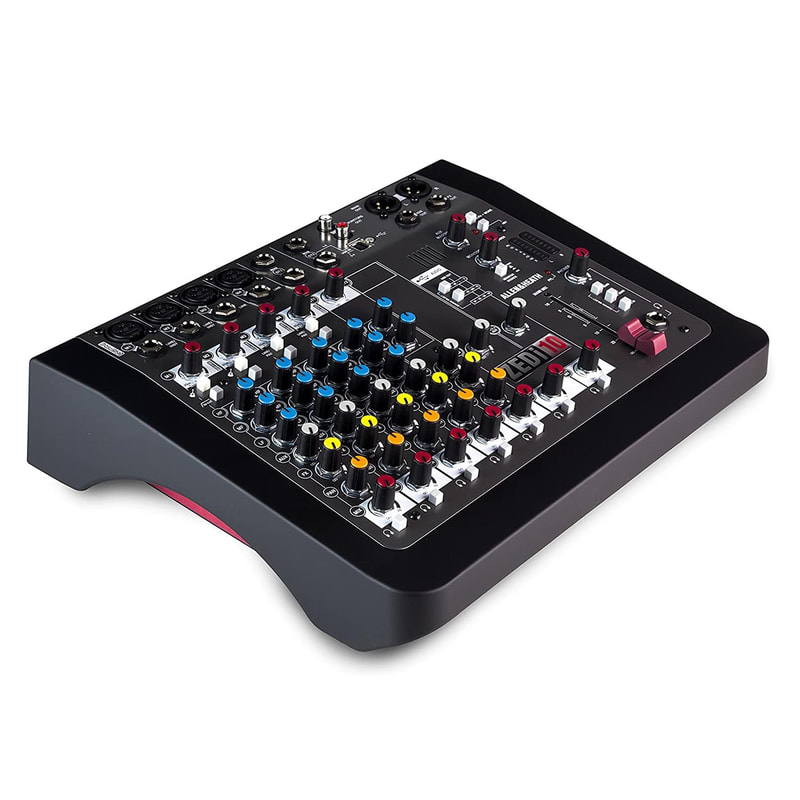
- Allen & Heath ZEDi-10
 |  |  |
Also, each one of these listed also record to a DAW (digital audio workstation) through a USB cable, which is sometimes the preferred method for podcasters. I've gotten to where I like recording to an SD card, it cuts out the need for a laptop during recording, although I like having mine so I can quickly Google facts, quotes, articles, etc.
The best equipment doesn't have to cost the most money, and it boils down to having the tools that are allowing you to produce what you want to produce at a quality that you're proud of.
FOR YOUR PURCHASES. THANKS FOR YOUR SUPPORT!
WE NOW BUILD PODCAST TABLES!
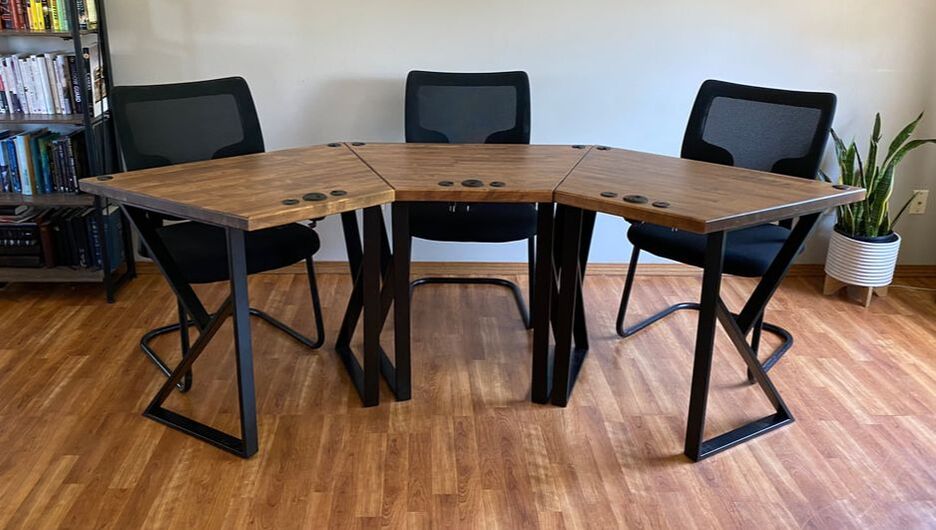
 1 or 2 person podcaster table |  Modular Custom-Built Podcaster Live Stream Table |
DIY BEFORE & AFTER PHOTOS
Before | AFter |
*Use of these affiliate links may result in me receiving a small commission
for your purchases. Thanks for your support!
 Tabletop Mic Stands |  Power Grommet | 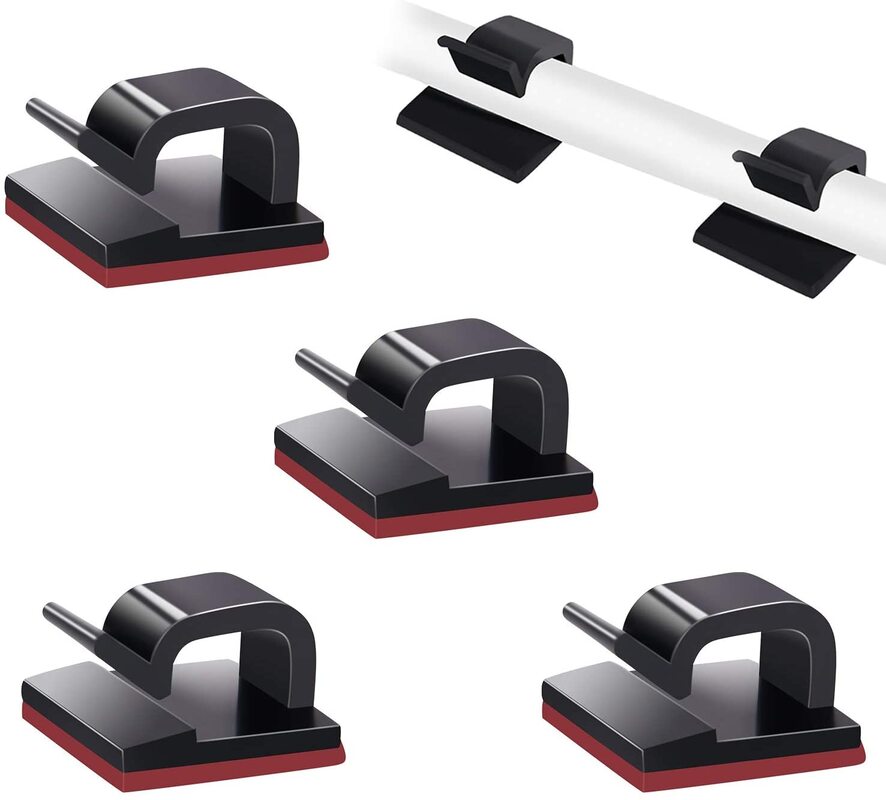 Adhesive Cable Clips |  Desk Grommets |
BEFORE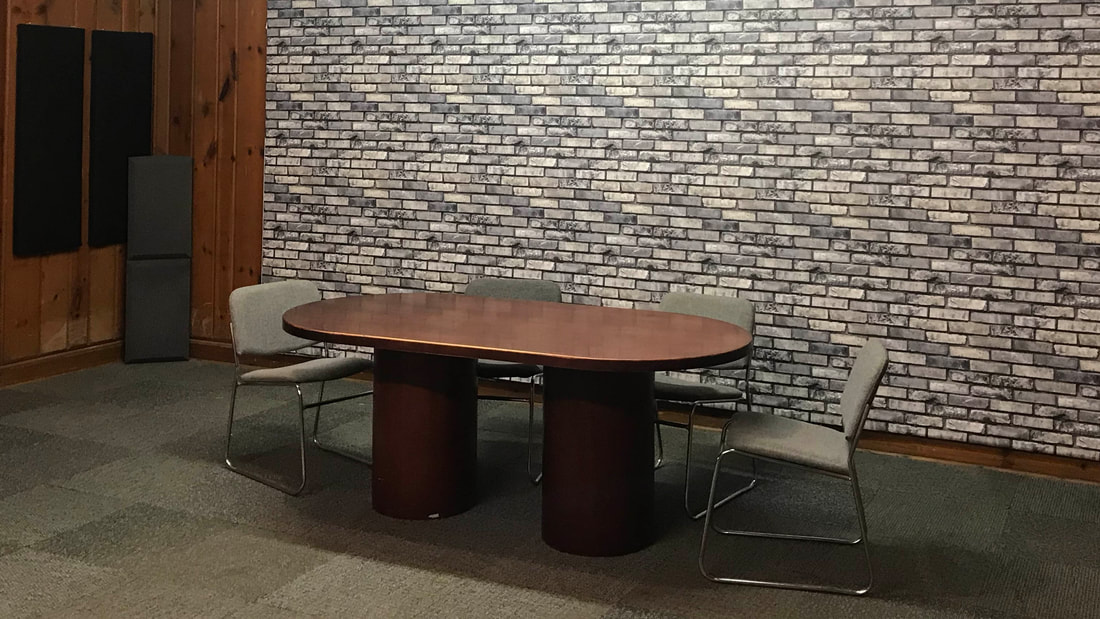 | AFTER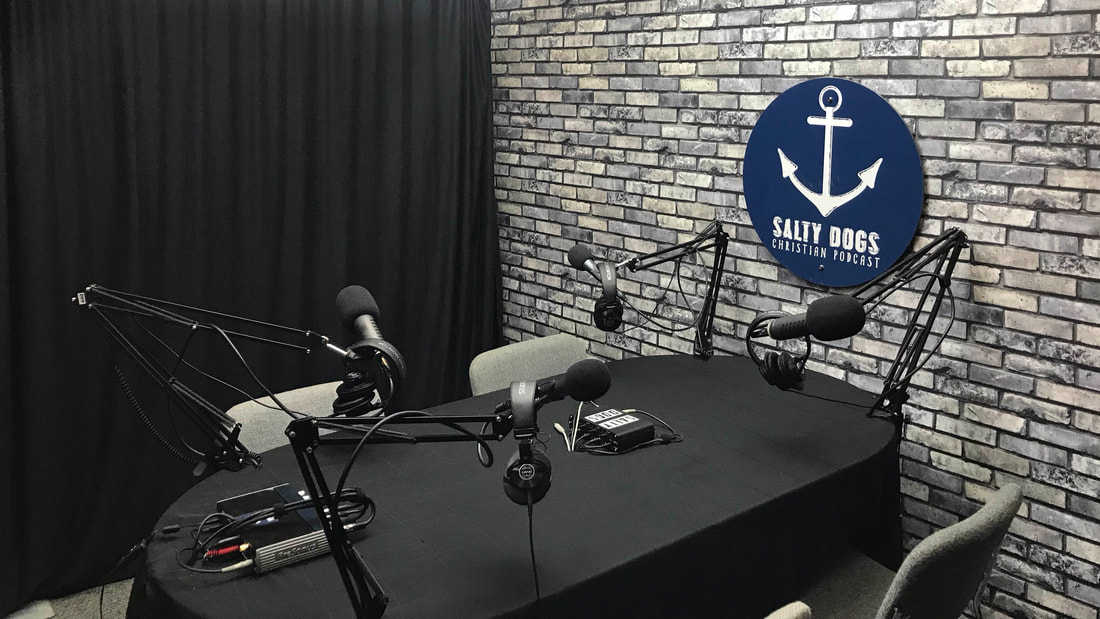 |
 Microphone Boom Arm | 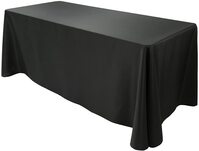 Black Tablecloth | 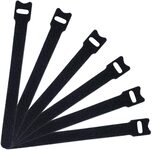 Velcro Ties |
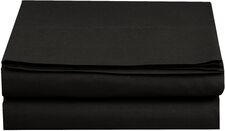 King size flat sheet | 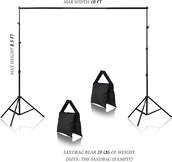 Backdrop Stand |
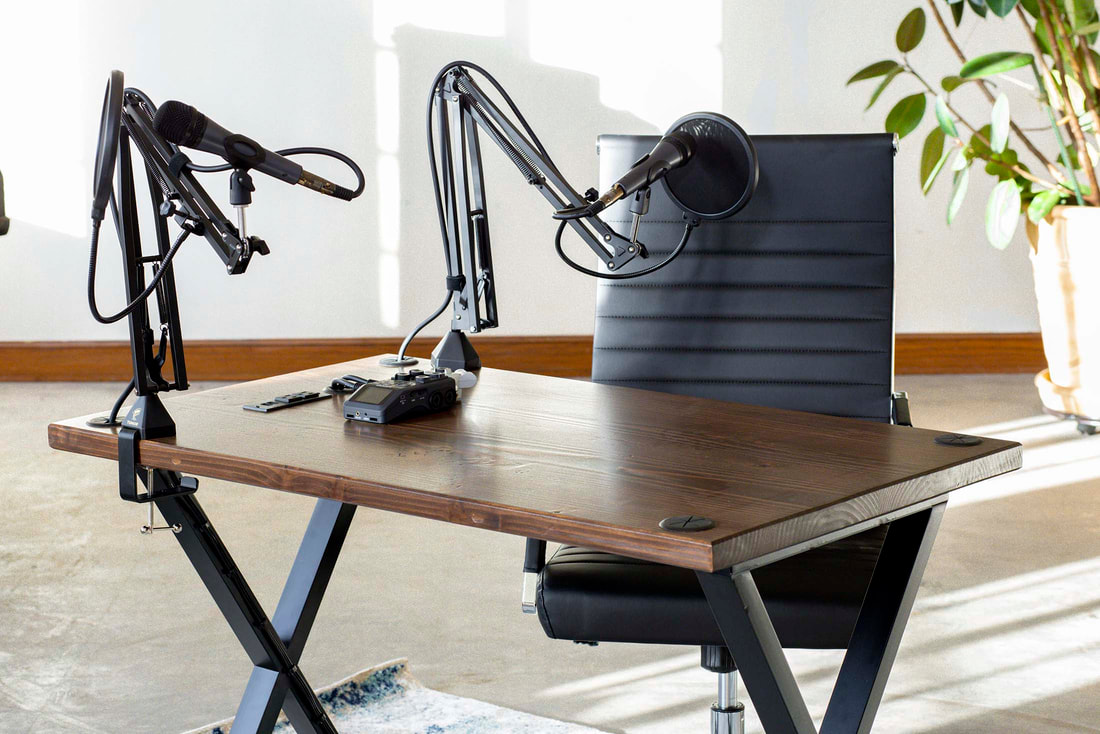
Podcasting can get rather expensive, especially when investing in high-quality microphones, mixers, and headphones. If you livestream like we do, then aesthetics can also come into play. You want a neat, good looking podcasting table, but since you're just starting out and have already spent quite a bit of money getting started, you want to spend as little as possible. I put together our tables for under $100 each, with a little luck and a little ingenuity. This is my inexpensive DIY podcasting table journey.
Use Facebook Marketplace, Craigslist, Garage Sales, and Amazon
I knew I needed a table big enough for four people, and I also knew that I wanted a wooden table so that I could drill holes and use nails or screws for cable management and mounting things. So plastic was out the question for me. The first things that came to mind were kitchen tables and conference tables. I quickly searched the web hoping for something very cheap to come up. Buying new was out of the question for me, based on the pricing that I found. It was time to get crafty.
My savior? Facebook Marketplace! I typed in "conference table" into the search bar and found just what I was needing for only $50 from a small private school. Within hours it was hauled into our basement studio. Luckily our church had a closet full of unused chairs, so I snagged four for the podcast table (with permission).
Not everyone has chairs laying around that they can use, but check out the FREE section in Facebook Marketplace and Craiglist in your area, you never know what you might find!
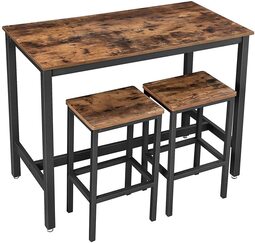
INEXPENSIVE NEW TABLES FROM AMAZON FOR PODCASTING
 $109.99 TABLE & CHAIR SET | 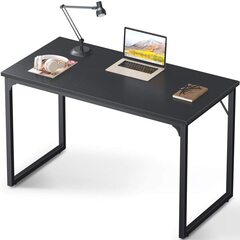 $59.99 OFFICE DESK |
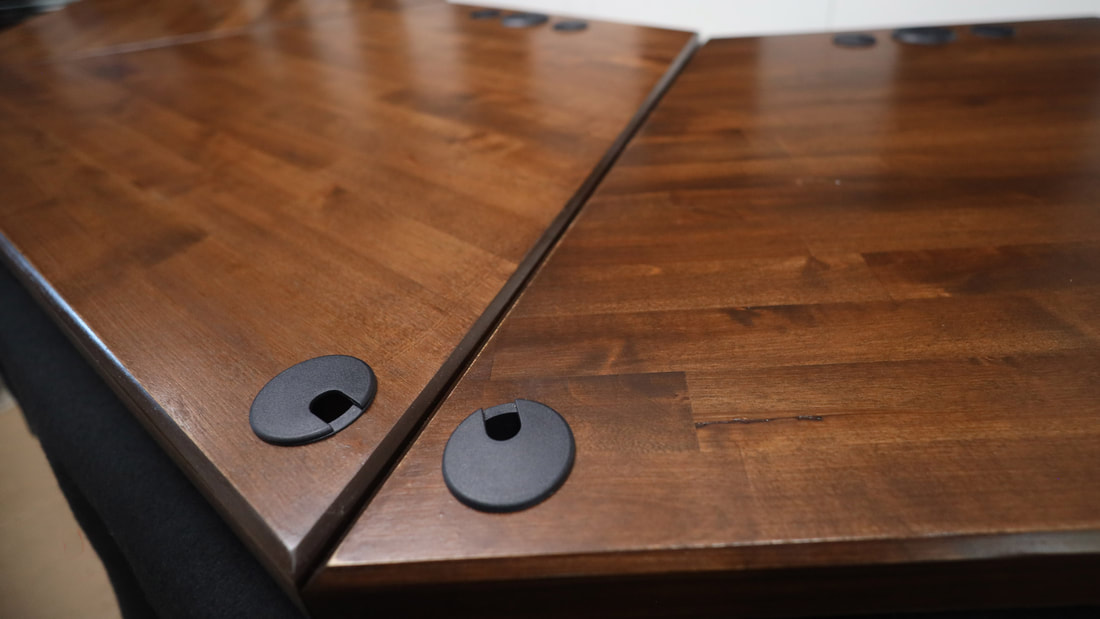
Use Power Grommets, Cable Grommets and Cable Ties
There were a few things I knew I wanted to do to my table - add desk grommets so I could make sure my cables were tied together or managed in a way that kept them organized and out of the way, off the top of the podcast table. If you have cables running under the bottom of your table, the last thing you want is someone accidentally unplugging something with their feet during your recording. Believe me, it happens.
I used a two inch hole saw to bore through the tabletop where my two-inch desk grommets would go. Before drilling, I set out my podcast stands to see where I wanted them and then marked where I would be drilling. Measure and plan twice, drill once.
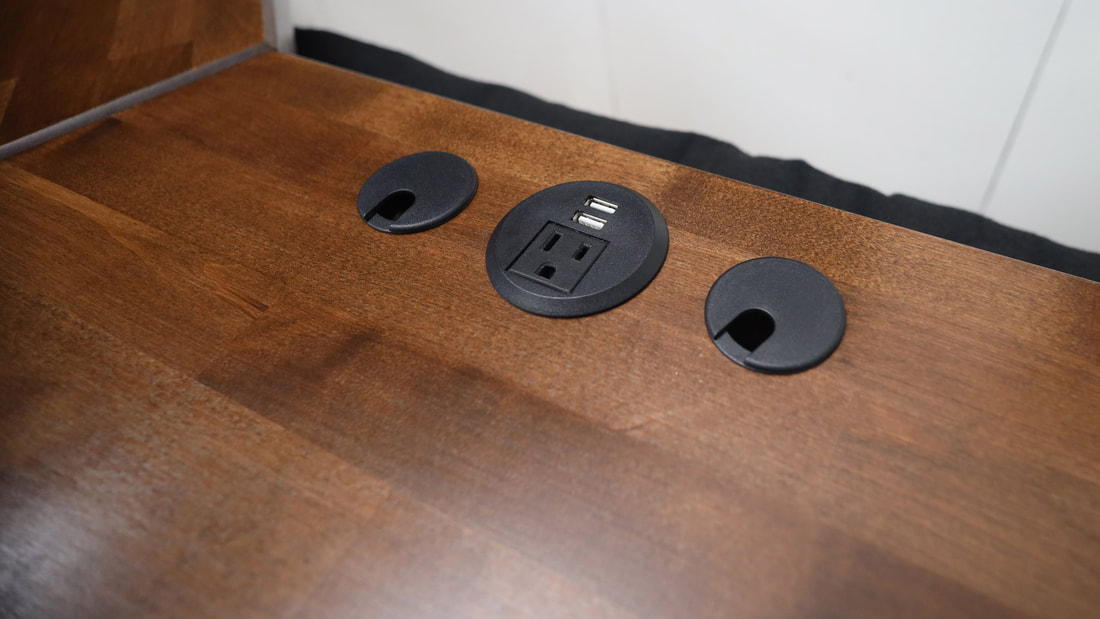
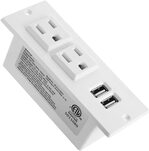
To power the USB interface and headphone amp, I installed a two outlet power grommet in the center of the table. The outlet comes with its own power cable, so I ran that to the nearest wall outlet with an extension cord. It also has two USB ports where I can plug in phone chargers, etc. Believe it or not, some people do want to charge their phones while they're podcasting. Me, I'm some people.
Use Paint, or A Tablecloth
For one of our podcast tables, all I did was use a black tablecloth over the top, and cut holes through the fabric to be able to run my cables. The other table I decided to paint instead of using a tablecloth. If I had to do it again, I'd paint my table a color other than white because all the little knicks and scratches show up easily. And with the black tablecloth, I'm constantly having to brush off the dust and particles that accumulate with each use. I suppose it's all part of the deal! You decide which way you want to go.
*Future tabletop idea: use free pallet wood cut into strips that create a top for a used conference table, sand, and then stain. In this case, I'd drill out desk grommet holes and mount a power grommet in the center of the table.
Use Moving Blankets As An Inexpensive Sound Treatment Solution
This doesn't necessarily have to do with your table, but it is a simple, inexpensive solution for a problem you may run into. Depending on where you're recording your podcast, you may have sound reflections. Reflections are caused when sound travels and bounces off of bare walls and floors, causing your audio to sound like you're sitting in an empty room or in an echo chamber. Hanging a few moving blankets on your walls and placing a rug on the floor are the easiest fixes, but certainly not the best treatment. If you're looking for more professional treatment, check out these kits at Sweetwater.
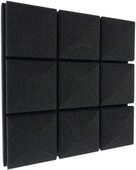 | While I chose to use moving blankets, there are many other options for sound-treating a room. Amazon.com carries a slew of acoustic panel options, and many podcasters will opt to put these up all throughout their studio. It certainly is more aesthetically pleasing to the podcaster eye! |
 Adhesive Cable Clips $7.95Use adhesive clips for cable management under your table. | 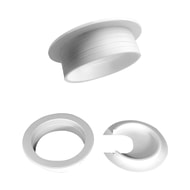 2" DESK GROMMETS $6.99Drill holes and install grommets to run cables off of the tabletop. | 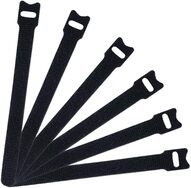 VELCRO CABLE TIES $7.99Velcro cable straps are an easy way to organize cables out of the way. |
 Mini-outlet $12.99Install an outlet into the top of your podcast table for easy access to power. | 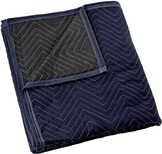 MOVING BLANKET $14.49Moving blankets are a cheap way to help dampen sound in your room. | 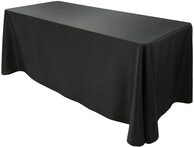 6ft Black Tablecloth $14.99If you don't want to paint your tabletop, throw a cloth over it! |
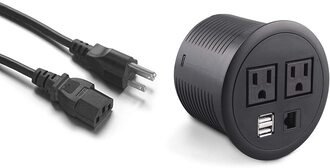 Power Grommet $35.99Get power, network access and USB charging ports with this power grommet. | 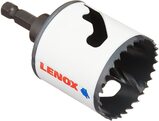 2" Hole Saw |  Retractable power grommet $26.99This is a fancier version of the power grommet. Put it away if you don't need it! |

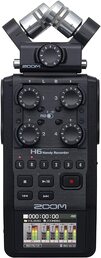
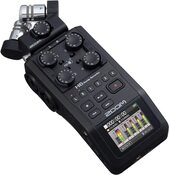
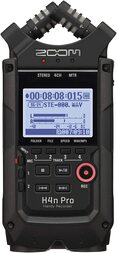
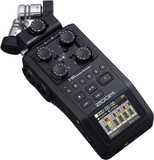
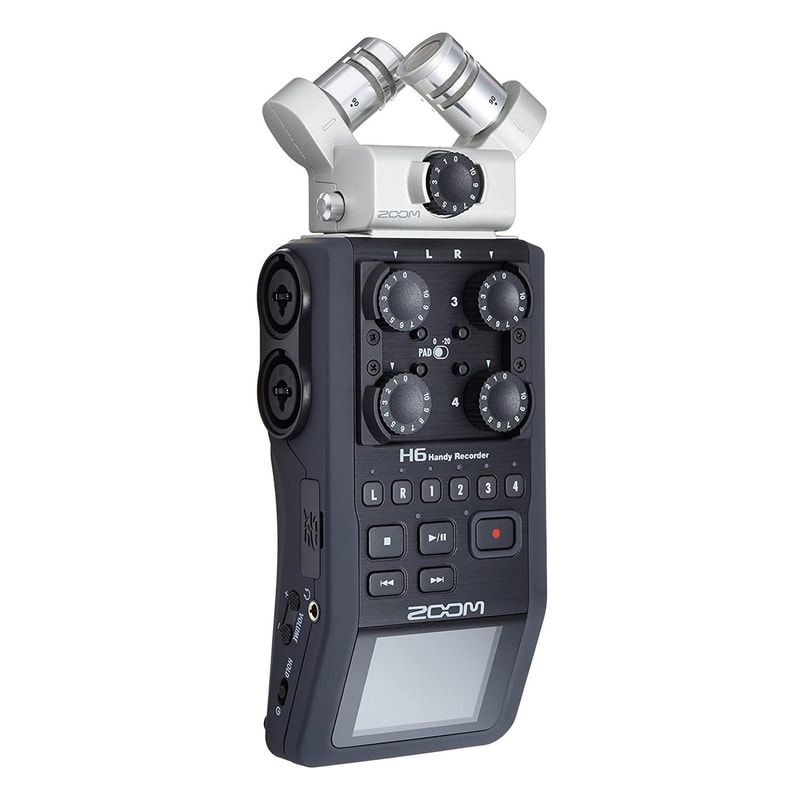
1) Portability
The Zoom H6 is small enough to fit in a backpack, camera bag, purse, or fanny pack (if that's your thing). Fanny pack podcasters, that's great. Simply put, the Zoom H6 fits in your hand and runs off of four AA batteries. Get yourself a good set of rechargeable batteries, it's a better way. It's portable, and packs a lot of recording power.
Speaking of power, it will also give phantom power (48v+) if you're running a condenser mic that requires phantom power. Trick of the trade: purchase a USB power bank to run the recorder off of external power, and mount it with velcro. I've never run out of juice, even recording hours worth of audio in one day, on multiple channels.
2) 4 XLR Channels
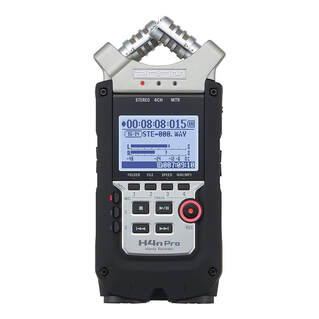
If you're like me, I like inputs. The more, the better. Why's that? Opportunity my dear friend, opportunity. If you're a solo podcaster, the Zoom H6 might be a bit much for you, try the Zoom H4n. However, if you're needing two plus mic inputs, the Zoom H6 does it, and does it well.
Control each input with a simple dial that gauges the gain from 0-10, with a red light that lights up if the channel is peaking. The Zoom H6 also offers limiting and compression on the XLR channels, a great addition for the podcaster. Record each channel independently to an SD card for ease of uploading and editing.
Seriously, you can now get a Zoom H6 for only $329. You might consider that a large amount of money, but you're buying a really powerful tool. If you needed a four person podcast setup, you could finish that gear haul for only about $500 buy purchasing Shure SM48s and budget XLR cables on Amazon.
Bonus Features
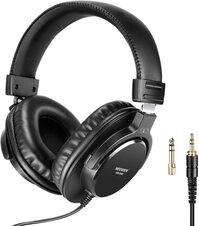
The Zoom H6 has a 3.5mm line out that's very useful, as well as a 3.5mm headphone jack for monitoring. My favorite headphones? The Senal SMH500s. Most Zoom H6 units come with a detachable mic head in an XY pattern, or with a cardioid mic head for on-the-go recording into a stereo track.
The H6 records individual WAV files in any of the following formats:
- 44.1kHz / 16-bit
- 44.1Khz / 24-bit
- 48kHz / 16-bit
- 48kHz / 24-bit (Best for podcasting)
- 96kHz / 16-bit
- 96kHz / 24-bit
In Conclusion
The Zoom H6 is a top of the line portable digital recorder boasting 4 XLR inputs at a great price, with features that are very beneficial to the beginner podcaster. Ready to purchase? Use any Zoom H6 link in this article to see the Amazon listing. If you buy it, I'll get a nice little percentage that'll make my day. Thanks for that!
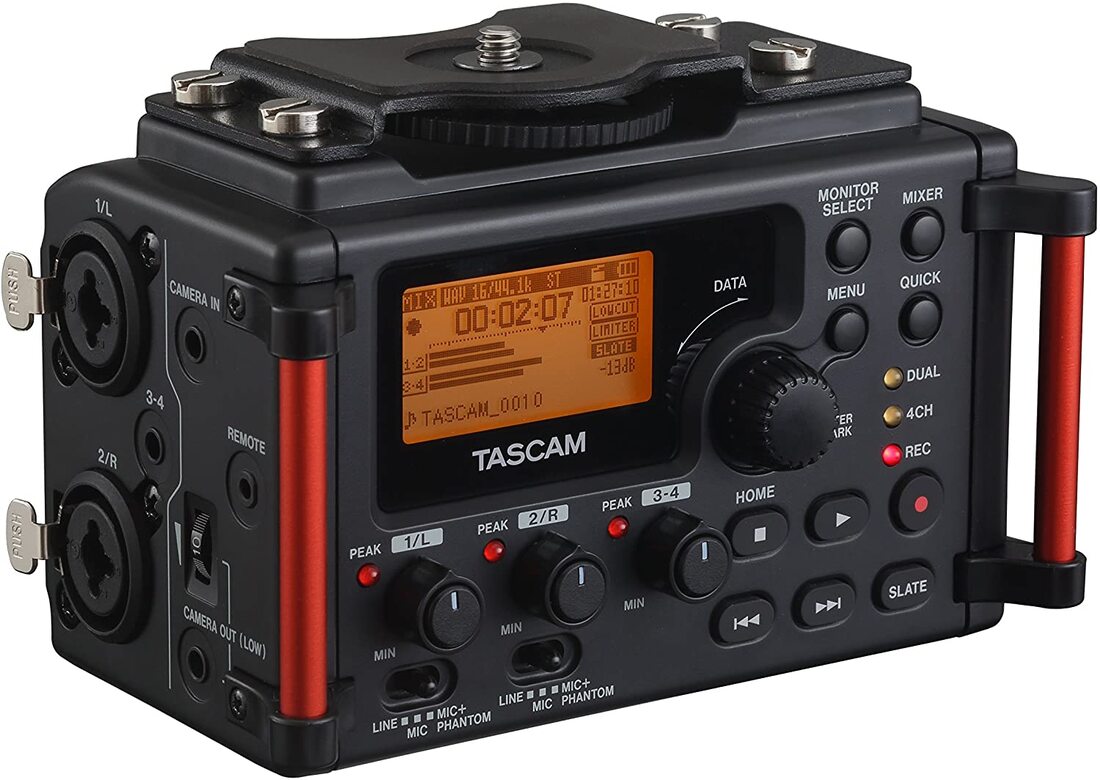
usb mixer + 4 xlr microphones into laptop, with tascam dr60 mkii for BACKUP RECORDING
|
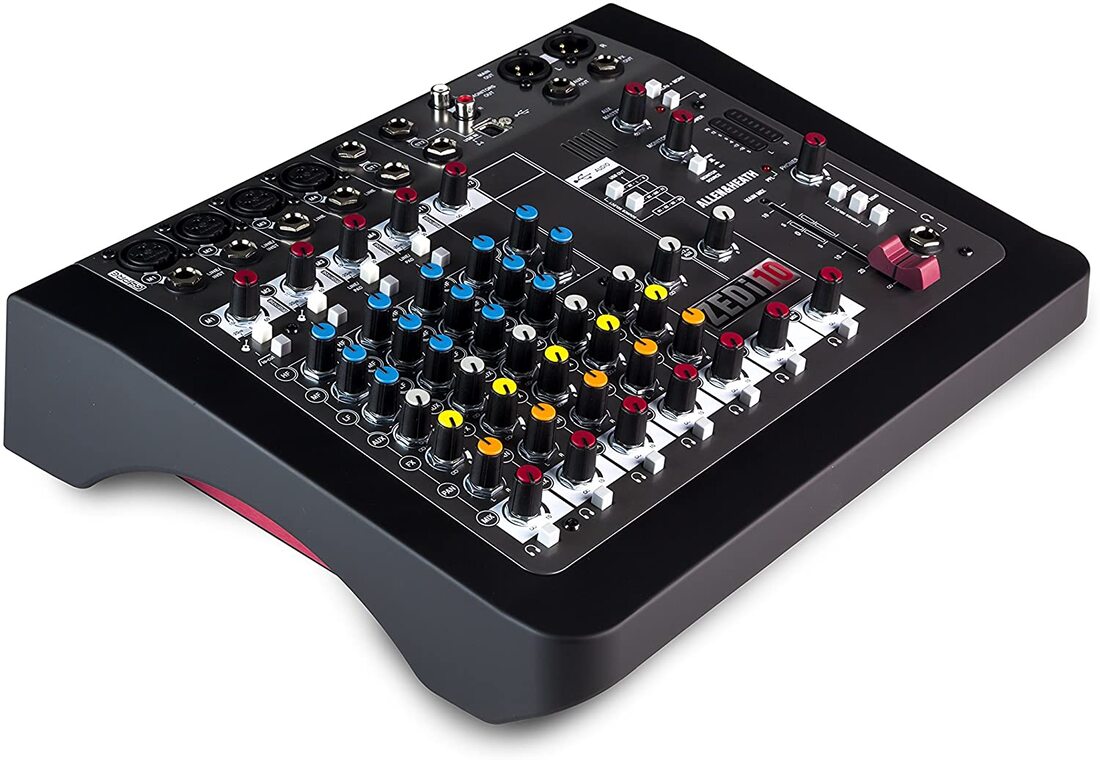
When I finally decided to upgrade my podcast setup from my first ever setup, the Allen & Heath USB Mixer was my first choice. I searched high and low for a USB mixer that would give what is called "4/4", or that is, four inputs through XLR and four outputs through USB. You must be really careful when purchasing a USB mixer!
You may think that just because it has as certain number of inputs that it will also send that many tracks to your Digital Audio Workstation (DAW). I needed four mics and four tracks, and this did the trick. At only $219 on Amazon, this is a very powerful mixer for podcasting! |
|
Here's how this setup works.
I use four Senneheiser e835 XLR Dynamic Microphones for vocals, plugging them into channels one through four via male to female XLR cables. From the mixer USB output I run a cable into my laptop. In Adobe Audition, I've selected the ZEDi10 as the audio input source via my preferences panel. Each track, one through four in the DAW is armed to record using each channel number one the mixer as the track number in the DAW.
From the ZEDi10 mixer, I've run the AUX 1/4" output into my Tascam DR60 input 1, and record the entire board mix into one track on the Tascam's SD card, just as a backup, in case something goes wrong, which is never out of the question.
I plugged a pair of headphones into the headphone jack on the mixer to check levels for each channel, while also watching the decibel meter inside of Adobe Audition to make sure vocals are clipping in the red zone, causing distortion. I usually shoot for vocals peaking between -3 and -9 decibels.
The Allen & Heath ZEDi10 USB Mixer is a powerful mixer for the beginning podcast who is looking to have more than one person at the podcast table, and is also using a computer to record their audio. It also has on-board EQ which is really helpful. In total, there's a headphone out, main outs, monitor outs, AUX out and FX out, so it has multiple analog options for outputs. You could even run headphones out of those jacks, if needed.
Below is audio from an episode we recorded using this very setup.
As always, feel free to reach out via email at [email protected] with any questions or comments. Thanks!
PURCHASE LINKS
One of the main differences between these two devices is how they actually reocrd audio.
USB Interface/Mixer - Plugs into your computer w/ a USB cable, connect to your DAW (digital audio workstation), such as Audacity, Garageband, Adobe Audition, and record onto your hard drive. Digital Recorder - Typically Records to SD Card in the Recorder.
Digital Recorders - MOBILE/PORTABLE USB Interface/Mixers - Not always as portable Outputs/Monitoring Digital Recorders - Typically one or two kinds of outputs: Headphone Jack, Auxiliary Jack Mixers - Multiple Outputs, good for live situations, livestreaming, monitoring, etc.
Email: [email protected]
Gear shown:
Rode Podmic: https://amzn.to/2ViTfN7
Rode Procaster: https://amzn.to/2B1hLM7
Sennheiser e835: https://amzn.to/2Nv27eq
Tascam DR60D: https://amzn.to/2ZoqobN
Zoom H1: https://amzn.to/31hatyn
Zoom H6: https://amzn.to/3hVMACi
Alesis Multimix: https://amzn.to/2A3jpw2
Presonus Interface: https://amzn.to/3i4CrDh
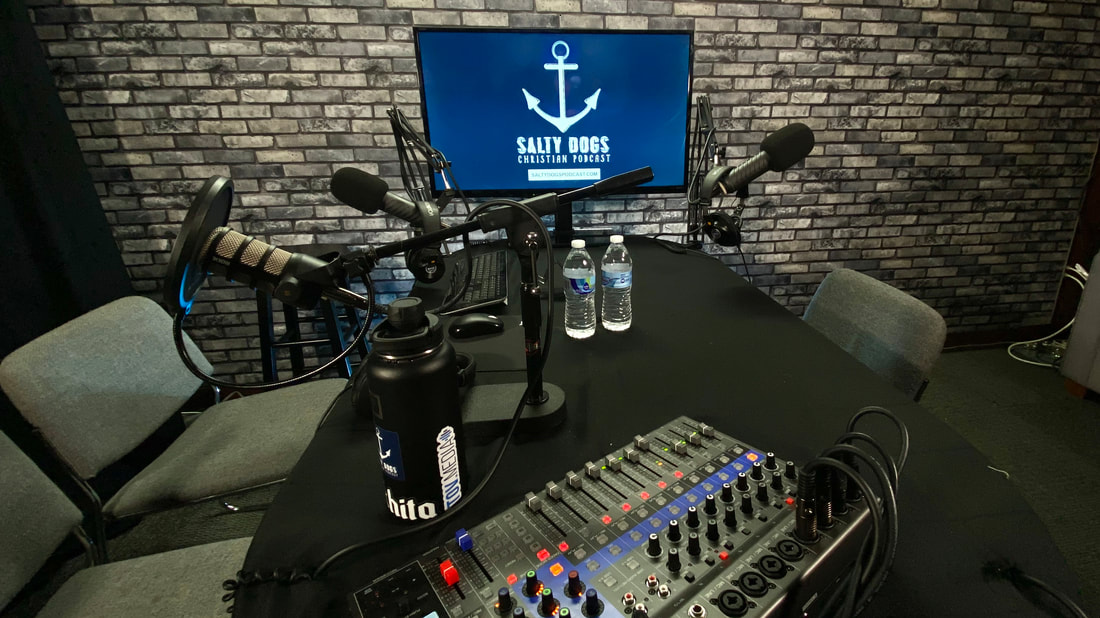
I'm part of a Christian Podcast called the Salty Dogs Podcast. We have 3 hosts and an additional seat at the table for any guests that we bring on, in person.
Our setup also allows us to Zoom in a guest if we need to, although we prefer in person more than anything. While recording, we go live to Facebook.
Here's a basic list of gear that we use:
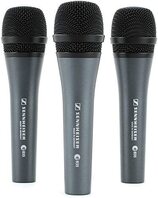
- 2 Rode Procaster Mics, XLR, Dynamic Mic, Cardioid Pattern
- 1 Rode PodMic - XLR, Dynamic, Cardioid Pattern
- 1 Sennheiser e835 - XLR, Dynamic, Cardioid Pattern
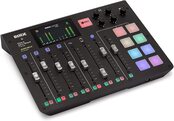
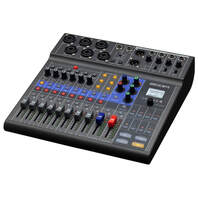
- Zoom LiveTrak L-12 - 12-Channel Digital Mixer & Multitrack Recorder
- Senal SMH500 Headphones
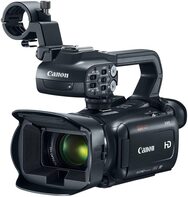
- Canon 5D Mark IV DSLR
- Canon EF 24-70mm f/4L IS USM Lens
- Epiphan Webcaster X2 (discontinued)
- DBX 266xs Compressor/Gate
The idea is this: we run 4 XLR Dynamic microphones into the Zoom L12 USB Mixer. The mixer allows us to send four headphone mixes, one to each person at the table. We run the main mix out from the soundboard into the DBX 266xs Compressor, which then runs into our livestream camera feed. We set up the Canon 5D Mark IV for video, and that runs HDMI out into the Epiphan WebCaster X2 Livestream device, where we go live to our podcast's Facebook page.
We're able to record all of our audio onto individual tracks onto an SD card w/ the Zoom L12 Livetrack Mixer. The great thing about livestreaming our recording is that Facebook will keep the video on our podcast page, and if for some reason we need it, the audio will always be on Facebook, even if we delete the files from our SD card or our computer later on.
The Canon 5D Mark IV has a recording time limit of 29 minutes, so we do not record the video onto the camera, unfortunately. The remedy for this would be to record onto an Atomos Ninja V external monitor / recorder, but that's around a $1,000 solution for high quality video. We'll pass for now.
Below is a sample of our podcast audio, along with an embed of our Facebook Live video recording. The studio is set for four people but we only had two hosts for this particular recording. As always, feel free to email with any questions regarding podcast gear for beginners! It's my pleasure to help.
Plot Twist, You're WRONG! | Salty Dogs PodcastPlot Twist, You're WRONG! | Http://SaltyDogsPodcast.com | [email protected] | Text to 316-530-2313
Posted by Salty Dogs Podcast on Tuesday, September 29, 2020
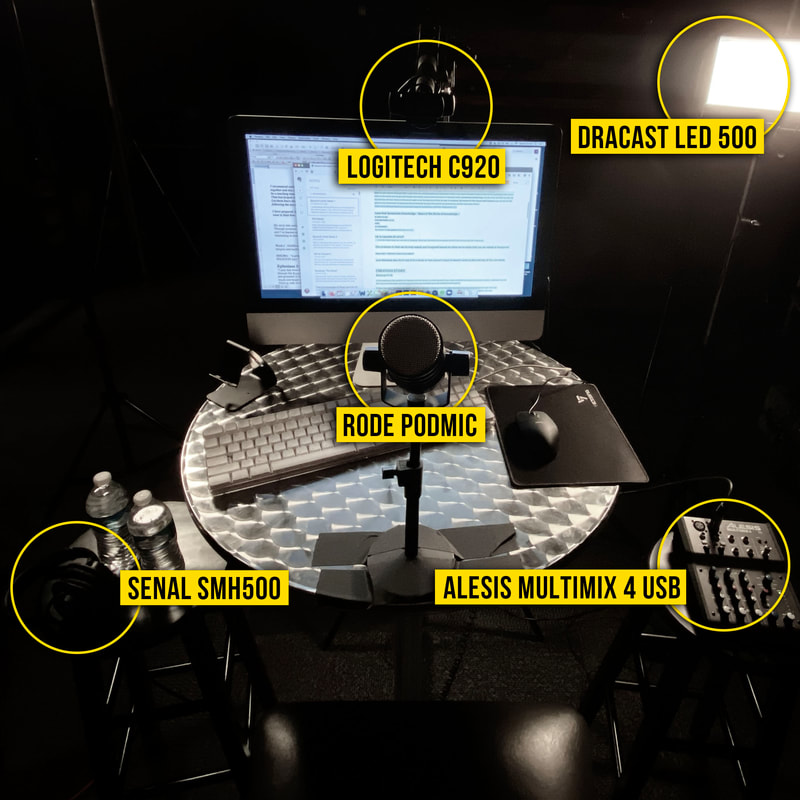
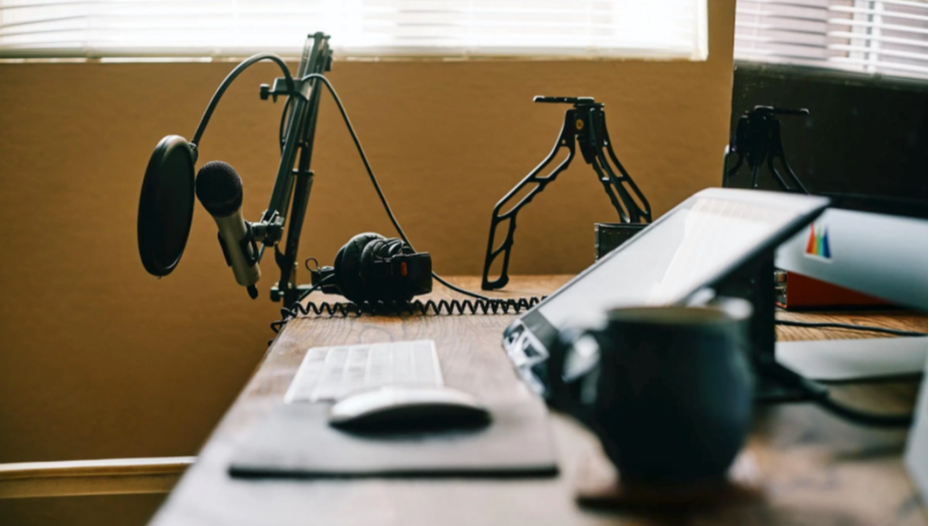
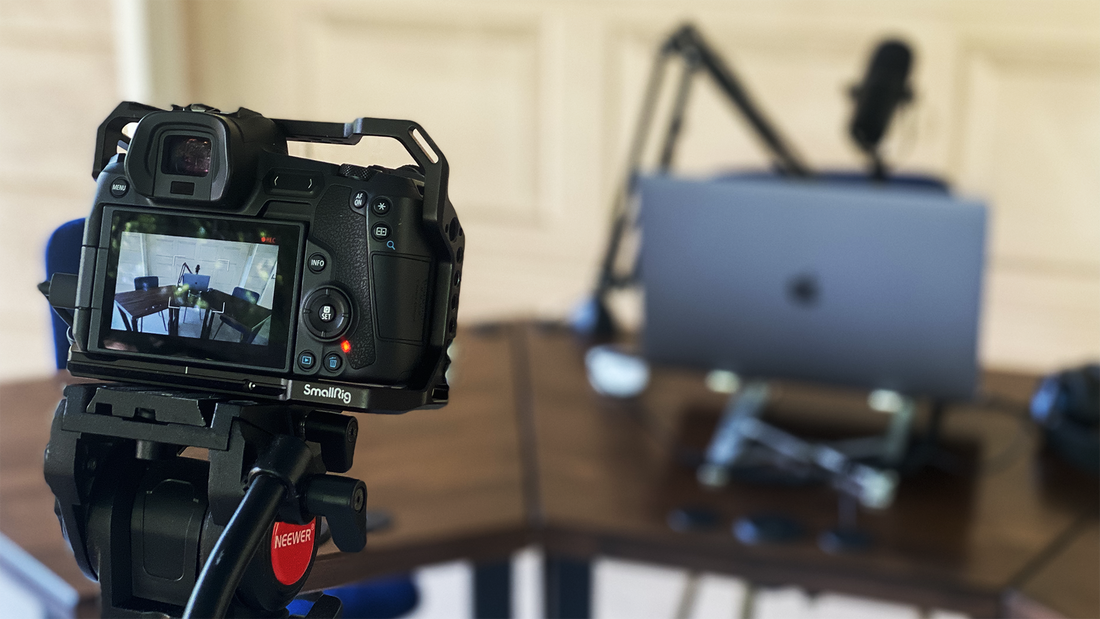
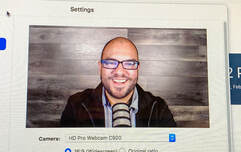
The image above shows my personal setup for presenting online via Zoom. I'm a podcaster and videographer, so all of this setup was pieced together by gear I'd already purchased, it was simply a matter of arranging it all to work for the Zoom platform. The technical side of this setup is the same for any scenario and doesn't necessarily require the exact gear pictured.
When putting together the above setup, I did three things to improve my presentation, and they're things you can do too that'll help your online presentation quality.
Here's the idea - in Zoom, you can choose your camera and your audio source in the Zoom preferences menu. If you have a laptop with a built-in camera, Zoom will default to that camera. This is how many will use Zoom, and the camera quality usually isn't that great and most likely doesn't do so well in low light scenarios.
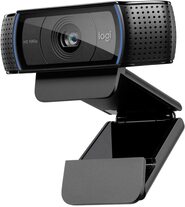 | Also, many built-in cameras only give a 720p resolution, which isn't considered HD, or high definition. I've connected a LogiTech C920 webcam via USB to my setup, and that camera gives a 1080HD image, and does really well in low-light. There are many other webcams on the market, but look for 1080HD with USB connection. You'll be looking at the $100-$200 range for LogiTech and HP webcams Amazon.com or BhPhotoVideo.com. |
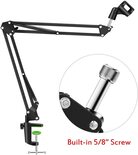
| 2) Upgrade your microphone. If I were to suggest a single upgrade for anyone doing online presentations, it would be upgrading your microphone. This is what happens in most cases: people use the internal microphone on their laptops or use a pair of headphones with a built-in microphone. The headphone microphone will sound better than the laptop mic, but neither give a high-quality sound. My solution is to purchase a USB microphone. USB mics will give you a plug-and-play solution and greatly increase the quality of your audio. I've heard that people will endure bad videos longer than they endure bad audio. | 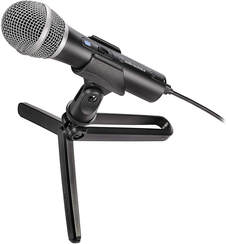 |
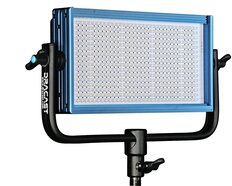 | You've seen it before, someone sitting against a window and the window is bright and their face is dark. Or, a dark, grainy image of someone's face dimly lit by a desk lamp. You can easily fix this problem with an LED light source. In my setup, I'm using the Dracast LED 500 which is what I use for other video shoots, but it's more than enough of a light source to give a wonderfully sharp, and well-exposed image. |
If you have any questions about this setup or any other audio or video topics, don't hesitate to email me at [email protected].
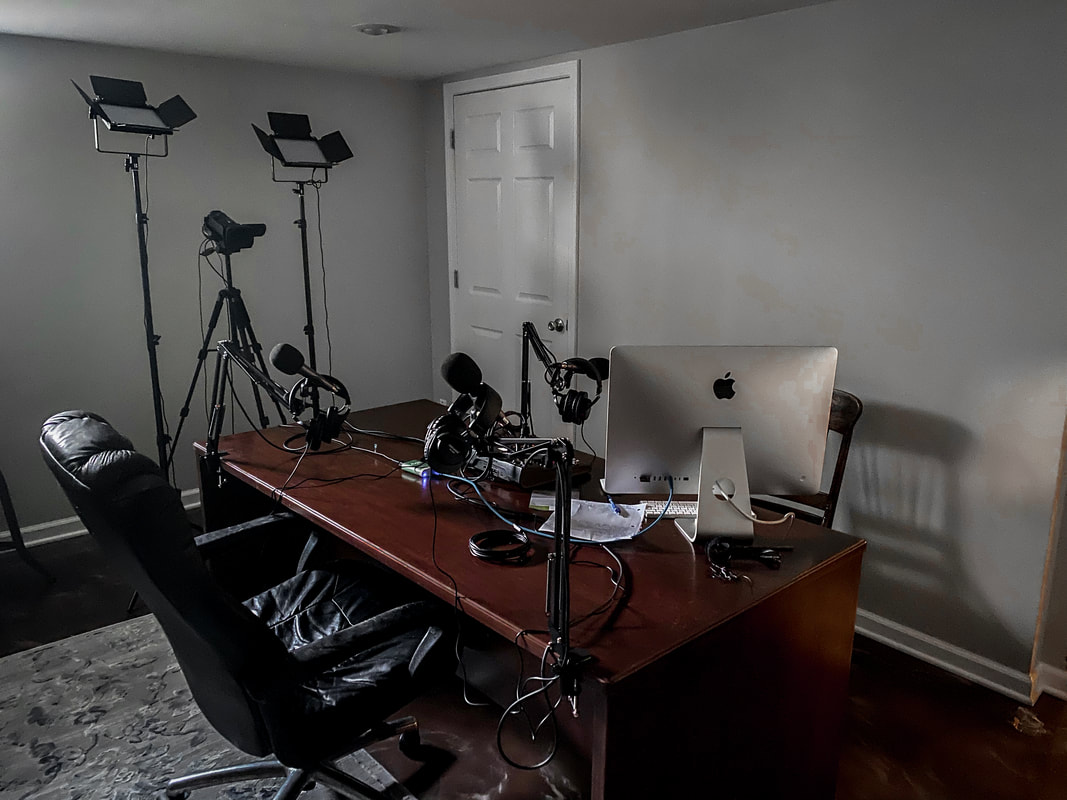
3 person podcast setup with livestream & video recording


SEE THE SETUP IN ACtION!
BUDGET
It's super important to consider budget right up front. Most people are looking for cheap and good, but that's not always a reasonable way to approach video and audio gear. In the audio and video world, you really do get what you pay for. I often advise people with small budgets to consider fundraising or saving longer to buy quality gear right out of the gate.
You'll often hear "buy this cheapo mic and mixer and just get started!" which is a fair sentiment, but it's not always practical. More often than not, people who take this approach end up upgrading equipment down the road and can't sell the cheapo stuff or get their money back. Think about what you're willing to invest in your project and dreams, and go from there. Then research what gear actually fits your budget. It helps me tremendously when putting together recording packages for people. Usually when I suggest gear without a budget number, people think it's too much. If I'm told a ballpark, I can fit the suggestion within that range and everyone is happy.
PURPOSE
Once budget is established, the next most important factor in considering what to buy is functionality. What are you trying to accomplish with your setup? Are you a solo podcaster? Are you going to have 2, 3, 4 or more people in person on your show? Will you have people as remote guests through Zoom or Skype? All of these questions help to understand what kind of gear is needed to achieve your goals. When it comes to what kind of gear you need, it always depends on what you're trying to achieve. This situation was calling for recording quality audio with multiple guests and hosts, a video camera to record video at the same time sending a livestream to social media.
MY PROPOSED PACKAGE
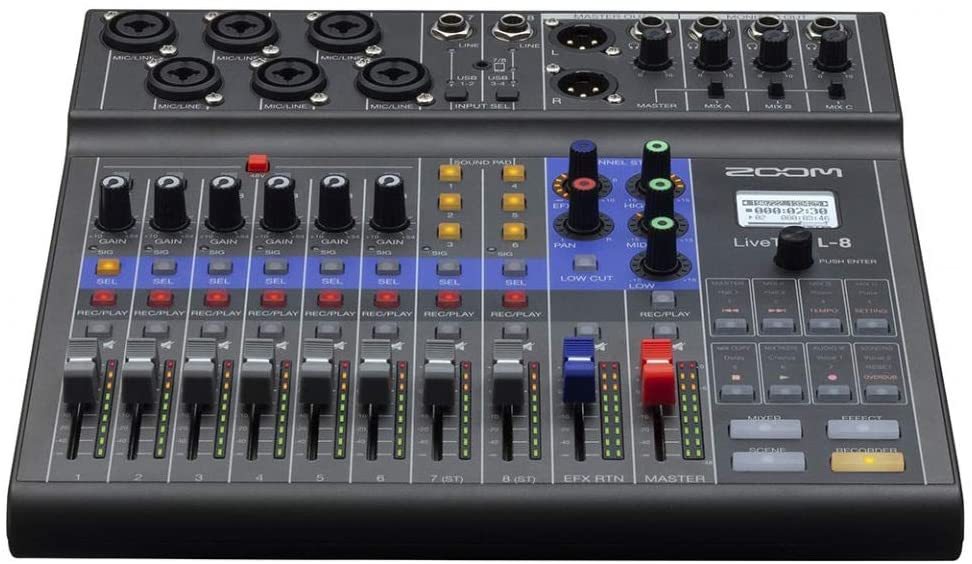
Since my friend would have up to three people in person in his home recording basement studio, I knew right away he'd need a mixer capable of handling multiple XLR inputs for microphones. With the added desire to livestream and record video, I knew the Zoom L8 USB mixer with be a great option. This mixer allows for up to 6 XLR inputs, has multiple headphone jacks so everyone can monitor using a nice pair of budget headphones, record to an on board SD card AND send the main mix into the Canon XA11 video camera.
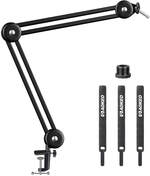
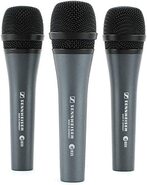
I suggested purchasing three pack of Sennheiser e835 XLR Dyanmic microphones with boom arms and windscreens to help with pops and breath puffs.
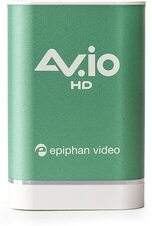
The feed from the board goes to the camera and the HDMI signal runs to the AV.IO HD HDMI encoder. Using a program called OBS (Open Broadcasting Software) on his Mac laptop, he'll be able to send the video and audio from the mixer to a livestream where OBS can send feeds. I believe he'll be streaming to Facebook LIVE. Viola! Podcasting and streaming setup for around $2,700. He'll be up and running in no time.
Powered by RedCircle
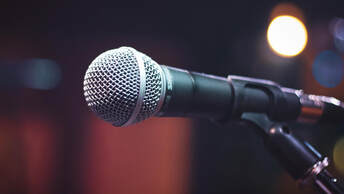
It seems like an obvious statement, but the kind of microphone you purchase will determine the quality of sound. It's said that people will tolerate poor video over poor audio, so since podcasting is typically only audio, this is a very important part of the equation.
You must be careful to choose the proper microphone type when making your purchase. Sometimes the price tag is the determining factor, so people buy a microphone and very quickly realize it's not what they thought it would be in quality and sound.
The majority of podcasts are recorded using a "dynamic" microphone, as opposed to "condenser" microphone, but there are shows that utilize condenser mics.
So what's the difference?
There are certainly technical differences in the way the microphones are constructed and how they work, but we'll skip all of the "techy" jargon and get to the point.
DYNAMIC MICROPHONE
ATR 2100x USB |
Dynamic microphones do not need a power source to function. You simply plug your XLR cable into the mic, and the other end into your mixer, interface or digital recorder and you're ready to roll.
Dynamic microphones are used in live sound situations such as presentations, key-note speakers and live bands. They're great in-studio for recording vocals for multiple applications. The cardioid pattern of dynamic microphones, or the area of the mic head that picks up sound, and its ability to "attenuate", or minimize room noise or ambient noise makes it great for podcasts. Dynamic mics work to pick up the majority of the sound coming straight into the head of the mic. |
CONDENSER MICROPHONE
ATR2020 USB |
In order to turn on, condenser microphones need external power sources such as batteries or phantom power. Phantom power is the built in +48v power on some mixers, interfaces and digital recorders.
If you plug in a condenser mic and it is not working, it's highly likely that it is because it lacks the phantom power to turn it on. Since condenser mics are powered, they are highly sensitive to sound coming into the front of the mic, and also any other sounds happening in the room. Condenser mics are used mostly to record vocals of one person in highly sound-treated rooms. If you were to place a condenser mic and a dynamic mic in a room with windows and dogs are barking outside, cars are passing by and the hum of the air conditioner is present, you'll hear it more through the condenser mic than you will the dynamic mic. Condenser mics are not bad mics, they simply have very specific applications. |
AUTHOR: jason villanueva
Jason is cohost of the Salty Dogs Christian Podcast. He enjoys podcasting, video-production, web-design, blogging, the keto way of life, working out, and smoking all the meats.
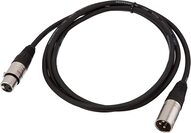
QUALITY & QUANTITY
First of all, an XLR microphone is a mic that uses an XLR connection. XLR stands for: X connector, Locking Connector, Rubber Boot. But most importantly, XLR is the industry standard for high-quality audio inputs. You'll also find that there's a much bigger pool of options for XLR microphones as opposed to USB mics. Most quality XLR mics will be in the $100 range, with budget mics as low as $48, and high quality mics all the way up to $600 plus. However, a $100 microphone is going to be great in quality. Listen to the $99 Rode PodMic on episode one of our podcast, and the $100 Sennheiser e835 on episode four of our podcast.
You'll find that most XLR microphones are very portable, in that they can easily fit in a backpack or a laptop bag. I used to carry around a small backpack with 4 Sennheiser e835 mics, 4 XLR cables and an audio interface. That made for portability and quick setup when going on-location to record an episode. The build on most XLR mics is solid as well, utilizing metal for the mic housing and not that you should drop your mics, but they often hold up well after having been dropped.
SCALABILITY
If you're a solo podcaster, then a USB mic could work well for you as a simple plug and play solution. However, if you're looking to add more hosts or guests to your show, in person, then an XLR microphone allows for scalability for your show. This is because when using an XLR mic, you'll need an audio interface, digital recorder or a mixer in order to use your mic to record audio onto your computer or onto an SD card. Many of these devices are available with multiple inputs, and more inputs means more mics, and that means more people on your show, if that's your goal. It is possible to connect multiple USB mics to your computer, however, it is a rare case to find podcast setups like this. Go for XLR.
Powered by RedCircle
XLR MICROPHONES
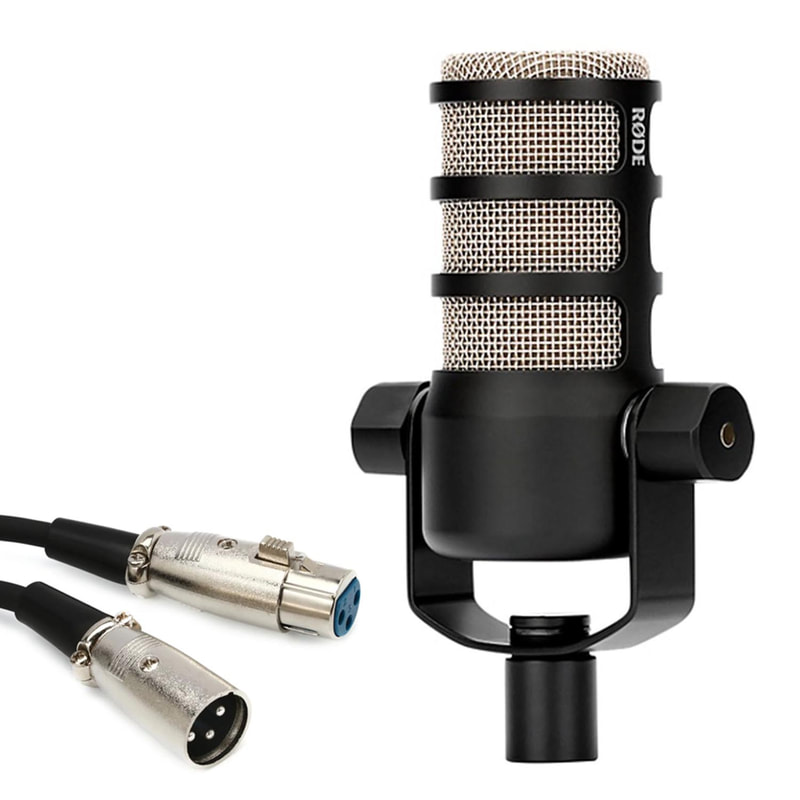
|
XLR microphones utilize the "XLR" connector, which is the industry standard connection for high-quality microphones. Unlike the USB microphone, XLR mics need to be plugged into mixers, interfaces and digital recorders using an XLR male-to-female cable. XLR mics are also very portable, but sometimes the additional gear needed to record can be bulky. If you're needing a highly portable recording solution, consider Zoom's digital recorders such as the H4n or the H6 along with an XLR mic. |
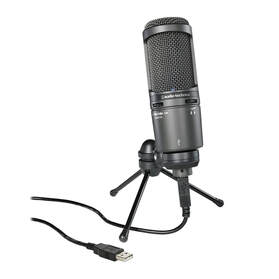
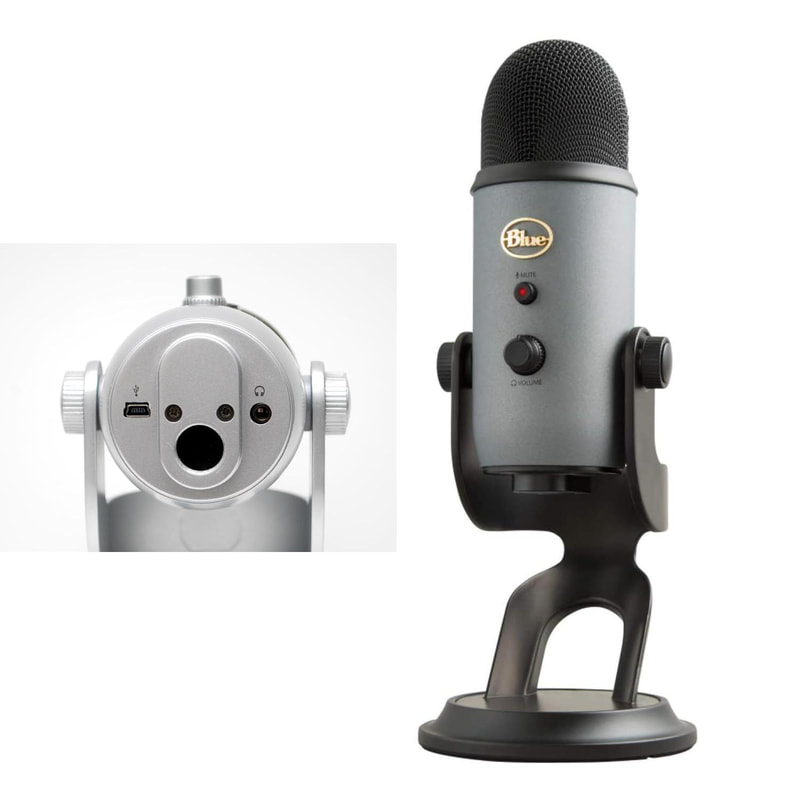
USB MICROPHONES
|
USB microphones contain all of the necessary wiring needed to connect to a computer through the USB port and start recording right away. Most of these kinds of mics will also have a headphone jack allowing you to monitor your audio while you record.
Unlike XLR microphones, you do not need a mixer, audio interface or digital recorder to get started. If you're looking for an easy "plug and play" solution for a mic, requiring as little gear and technical setup as possible, the USB microphone is for you. USB mics are very portable and work seamlessly on PC and MAC. |
 RSS Feed
Archives
August 2022
May 2021
April 2021
January 2021
October 2020
September 2020
August 2020
July 2020
June 2020
May 2020
April 2020
Categories
All
Digital Recorder
DIY
DIY Podcasting
Microphones
Mics
Podcast Desk
Podcast Equipment
Podcast Microphones
Podcast Mics
Podcast Recorder
Podcast Table
Podcast Tables
Podcast Tables For Multiple People
Portable Podcast Equipment
Sound Treatment
Zoom H6